Colddiver's Designs
I had a need for a Swift project that would have to download (malformed) html file, parse them to extract relevant data and import said data into a Core Data model. The good news: there are excellent libraries/frameworks to make this simple:
- NDHpple (a Swift port of Hpple), can do the parsing using XPath queries (requires libxml2)
- Alamofire (Swift) can help with the networking stuff
- MagicalRecord (Obj.-C) really can make things more pleasant on the Core Data side
The bad new, it is quite painful to setup the project to make them all work together. This post is about how to set the project so that everything will (mostly) work as it should. I’m writing this for my own benefit (so I can document how to do it again) and in the hope that it will help others…
Note that this tutorial was written for Xcode 6.4.
The Process
In a nutshell, the setup goes as follows:
- Create new project (don’t check Use Core Data)
- Install MagicalRecord through CocoaPods
- Install NDHpple
- Setup libxml2 in the project (build configuration – many steps there)
- Install Alamofire manually (it can be installed
- Setup Bridging-Headers.h for MagicalRecord (Shorthand) and make sure it won’t break libxml2
Detailed steps
I’ll be building on the excellent tutorial from James Leist and modifying as required…
1. Create the project
Start by creating a new Single View Application in Xcode. In the “Choose options for your new project” dialogue:
- For the purpose of this tutorial, I called my application TestApp
- select Swift for the programming language
- make sure that “Use Core Data” is NOT selected. Since we’ll be using Core Data through MagicalRecord, we don’t need to have all the boilerplate Core Data code.
2. Install MagicalRecord with CocoaPods
CocoaPods is a dependency manager for Objective-C and Swift projects. You can find all kinds of useful information about it on its home page.
If you never installed it, open up a terminal window and type:
$ sudo gem install cocoapods
Now that it is installed, we’ll use CocoaPods to initialize or Podfile. The podfile is where we specify which libraries/framework we want to have managed on our project. To initialize the podfile, cd into the root of your project directory (same level as the .xcodeproj file) and run the following:
$ pod init
An empty podfile has been created in your project folder. You can add this to your Xcode project by dragging the file into your Xcode Project Navigator (this will enable you to edit the file straight from Xcode, which is convenient).
Open up the Podfile in Xcode and make sure it looks like this:
link_with  ['TestApp', 'TestAppTests']
# Uncomment this line to define a global platform for your project
platform :ios, '8.4'
# Installing MagicalRecord as a framework breaks it
#use_frameworks!
source 'https://github.com/CocoaPods/Specs.git'
pod 'MagicalRecord/Shorthand'
target 'TestApp' do
end
target 'TestAppTests' do
end
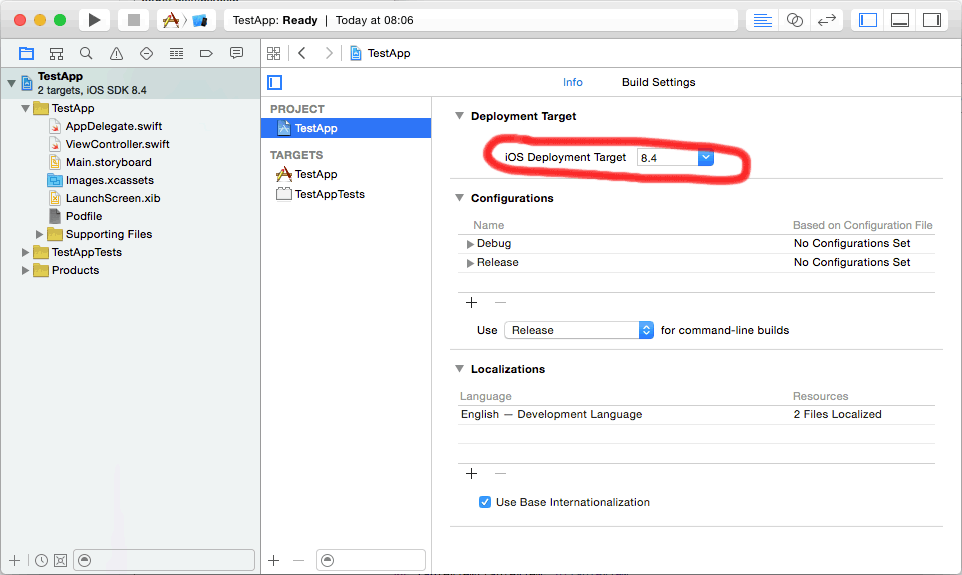
Make sure that the platform version matches with the “Deployment Target” of your project. You can confirm the deployment target by looking at your project settings like so:
I added a commented out line for use_frameworks! to remember that this has to be explicitly disabled for MagicalRecord to work. It would be tempting to install Alamofire using CocoaPods as well but because Alamofire is in Swift, it will require the the use_frameworks! to be activated. Bottom line, you can’t install both Alamofire and MagicalRecord with CocoaPods (if someone knows how to do it without getting into various issues with MagicalRecord, let me know because I have not figured that one out yet). If/when MagicalFramework is converted to Swift, we’ll be able to revisit this part of the setup.
The source line tells CocoaPods where to grab the package info.
The pod line tells which pod we want to have installed by CocoaPods. Note the Shorthand part – this is important.
Now, we should be ready to install the package. First close your project in Xcode. Then, run the following in the terminal:
$ pod install
Be mindful of the instructions you got after running pod install:
[!] Please close any current Xcode sessions and use `TestApp.xcworkspace` for this project from now on.
So go ahead and close the project and re-open it using the TestApp.xcworkpace. Your project should now look like this:
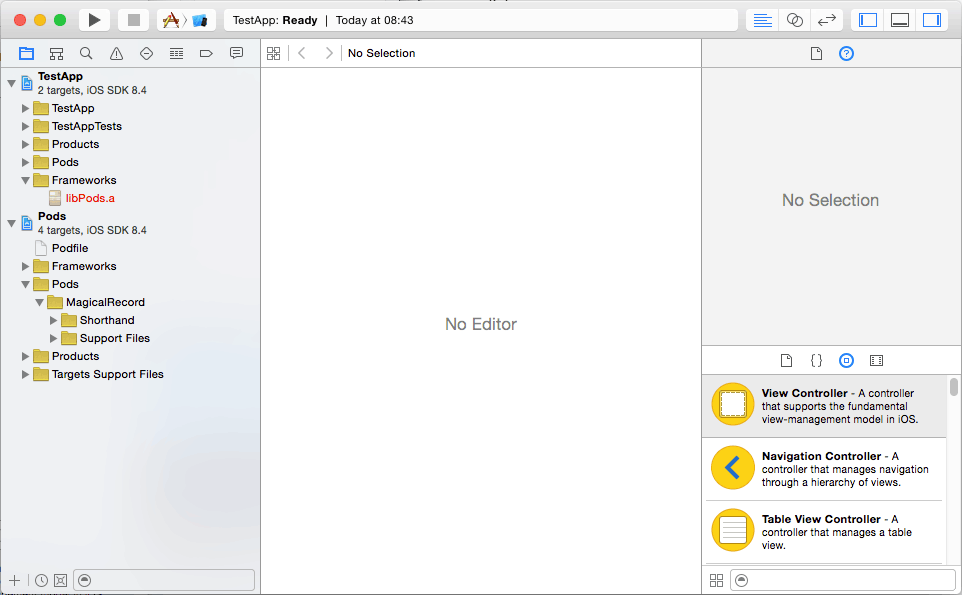
Notice that the podfile has been added under “Pods” (you can edit it from there now and remove the earlier reference).
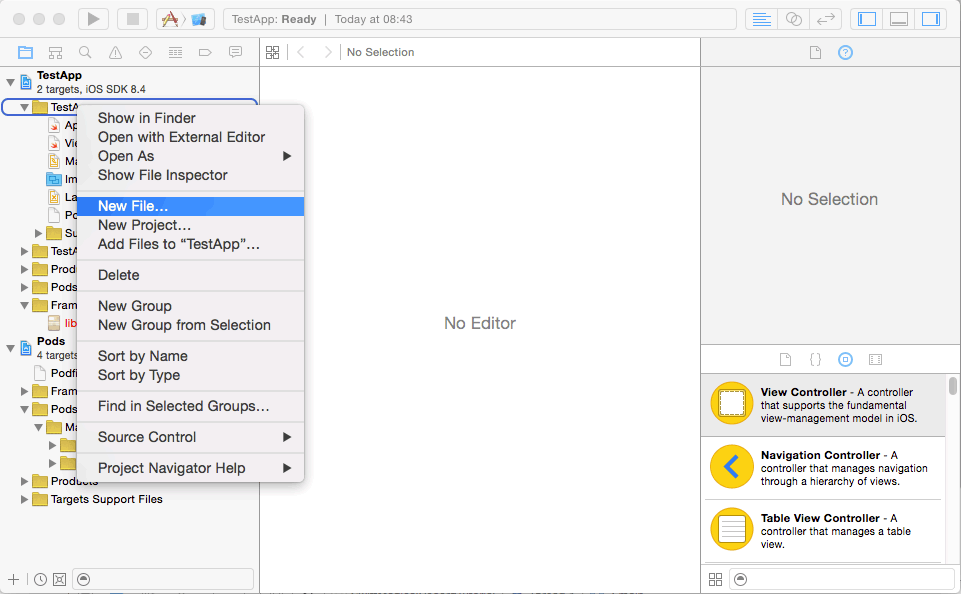
We now need to add a bridging header to allow the Objective-C MagicalRecord code to be useable in our swift project. To do so, add a file your project by right-clicking on the TestApp folder in the Project Navigator like so:
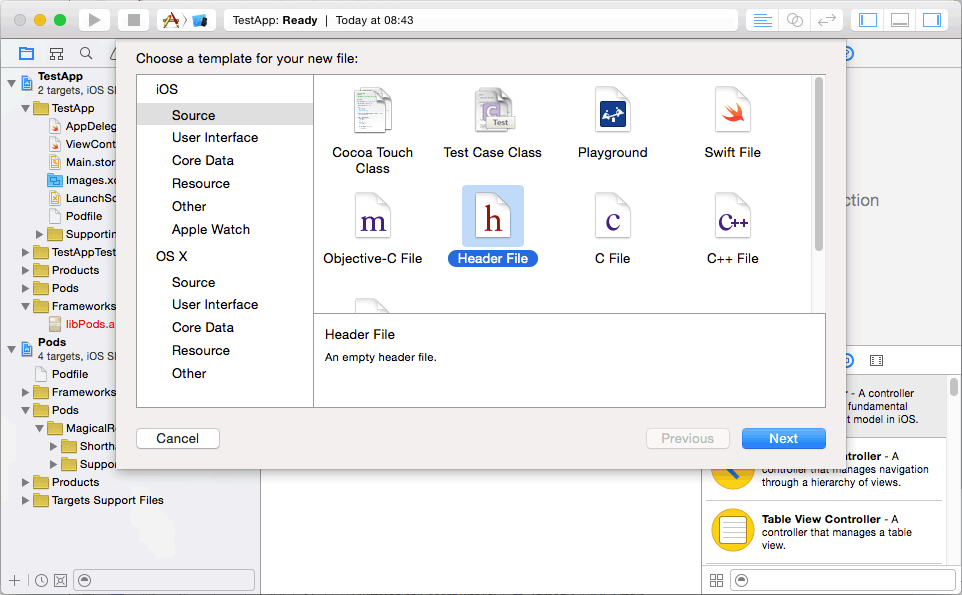
Select the header file…
… and call it TestApp-Bridging-Header.h (the naming convention for these file is <AppName>-Bridging-Header.h.
Your Bridging Header file would now be in your project like so:
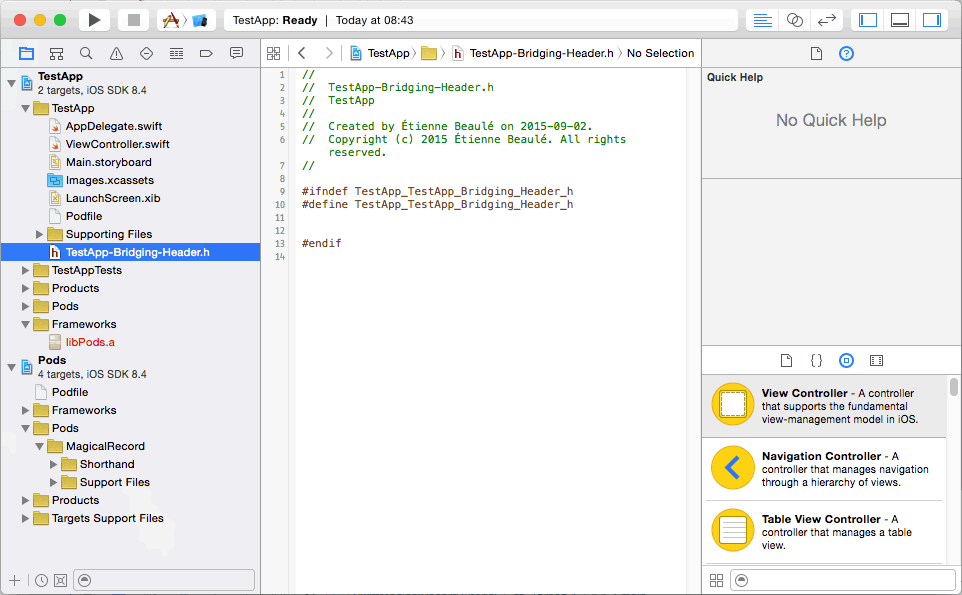
Edit TestApp-Bridging-Header.h to make it look like this:
//
//  TestApp-Bridging-Header.h
//  TestApp
//
//  Created by Étienne Beaulé on 2015-09-02.
//  Copyright (c) 2015 Étienne Beaulé. All rights reserved.
//

#define MR_SHORTHAND
#import <CoreData+MagicalRecord.h>
This will make MagicalRecord available to us but we need to make sure our project will use the Bridging Header file. To do so, go to the Project’s Build Settings and search for “bridg”. You should see the “Objective-C Bridging Header” setting. Double click on the empty field next to the label and enter TestApp/TestApp-Bridging-Header.h like so:

By setting this up at the project level, it will apply to all targets (including debug and release), which is what we want.
At that point, we should be creating a data model writing some code to confirm that everything works as it should. I’ll follow the steps from James Leist’s tutorial here.
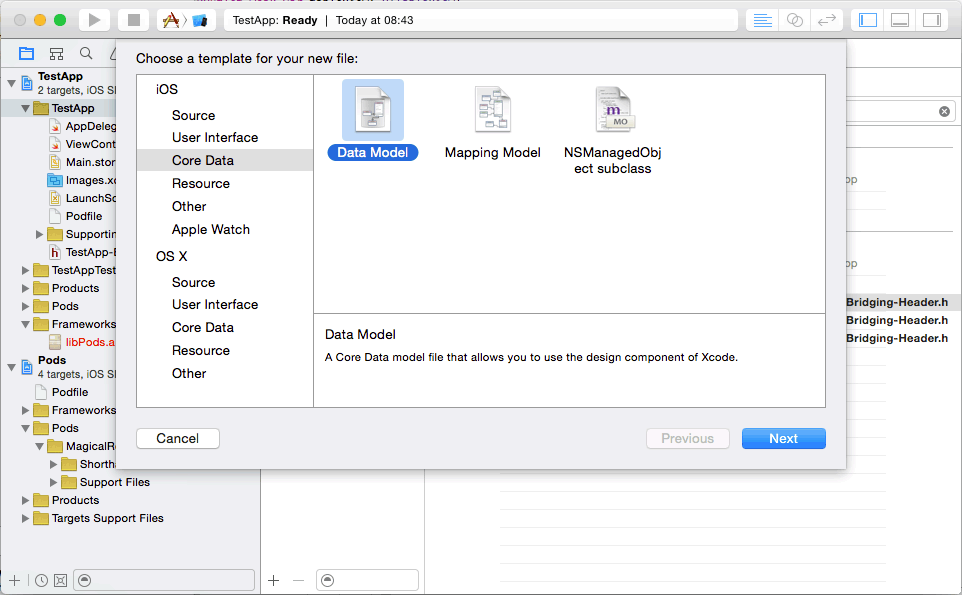
Let’s start by creating the data model. Right click on the main project folder and select “New file…” like we did before:
In this case, select a Core Data -> Data Model file like so:
In the next screen, name the model file after the application’s name (i.e. TestApp). You can use another name if you want but if you do so, MagicalRecord won’t automatically know what model file to use (no big deal, you can specify it and this is documented in MagicalRecord’s docs).
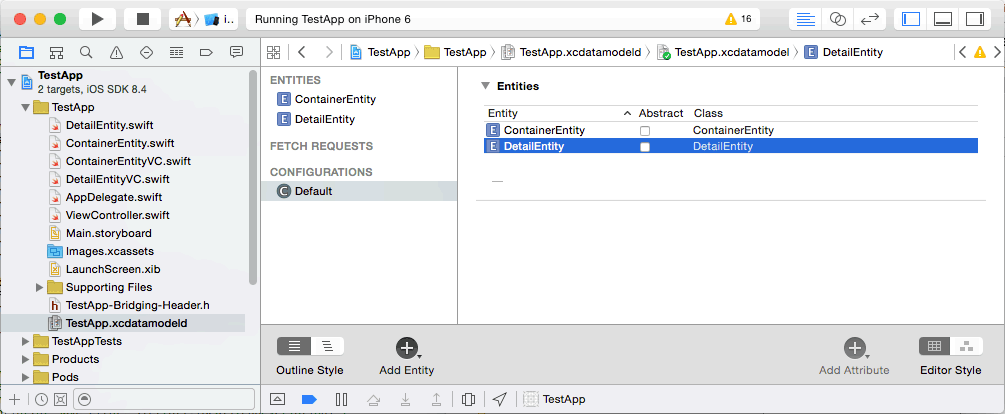
Now that we have a model file, we need to create some entities. Create the entities by clicking on the Add Entity button here:

Name the 2 entities as follows:
- ContainerEntity
- DetailEntity
Both entities should have a “name” attribute of type “String”. We must then create the relationships between the 2 entities like so:
- ContainerEntity needs a one-to-many relationship with DetailEntity. Name the relationship “detailEntities”
- DetailEntity should have a ont-to-one relationship with ContainerEntity. Name the relationship “containerEntity” and make sure to set the inverse relationship.
The following screenshots provide details and pointers as to where you can set this up for each entity.


We also need to make sure that a proper class name is set for our entities. The class name must be in the following format: <EntityName>. To do so, click on “Default” in the Configurations section and enter the Class names as shown below:
IMPORTANT: Be very careful with the above step. In some case, you will find recommendations to use a <AppName>.<EntityName> for the class name. This has never worked for me. Xcode seems to be picky about this and Xcode 7 apparently does it differently. If you experience errors like this when trying to create records in the app later on:
2015-09-02 10:41:33.240 TestApp[23765:1245743] CoreData: warning: Unable to load class named 'TestApp.ContainerEntity' for entity 'ContainerEntity'. Class not found, using default NSManagedObject instead. Could not cast value of type 'NSManagedObject_ContainerEntity_' (0x7ff1217861a0) to 'TestApp.ContainerEntity' (0x10249ce60).
… it is most likely due to a mismatch between the Entity class name.
We should now be ready to generate the classes. To do so:
- Make sure your data model is selected
- Go to Xcode’s Editor Menu and select “Create NSManagedObject Subclass…”
On the next screen, make sure your app’s data model is selected like so:

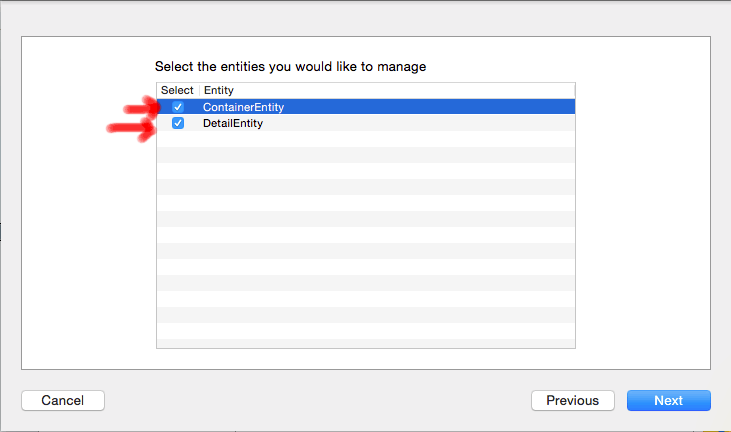
On the next screen, select all your entities like so:
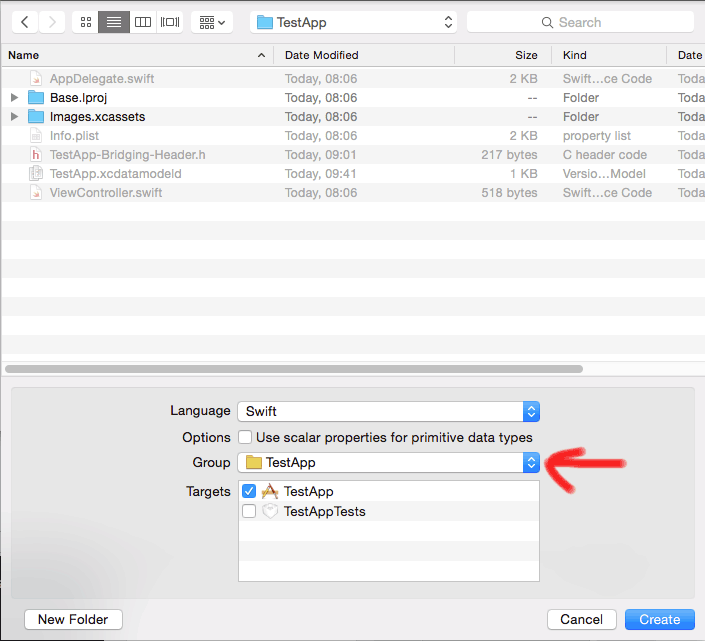
On the save dialog, make sure you select your project’s main folder for the “Group” and “Swift” as the language like so:
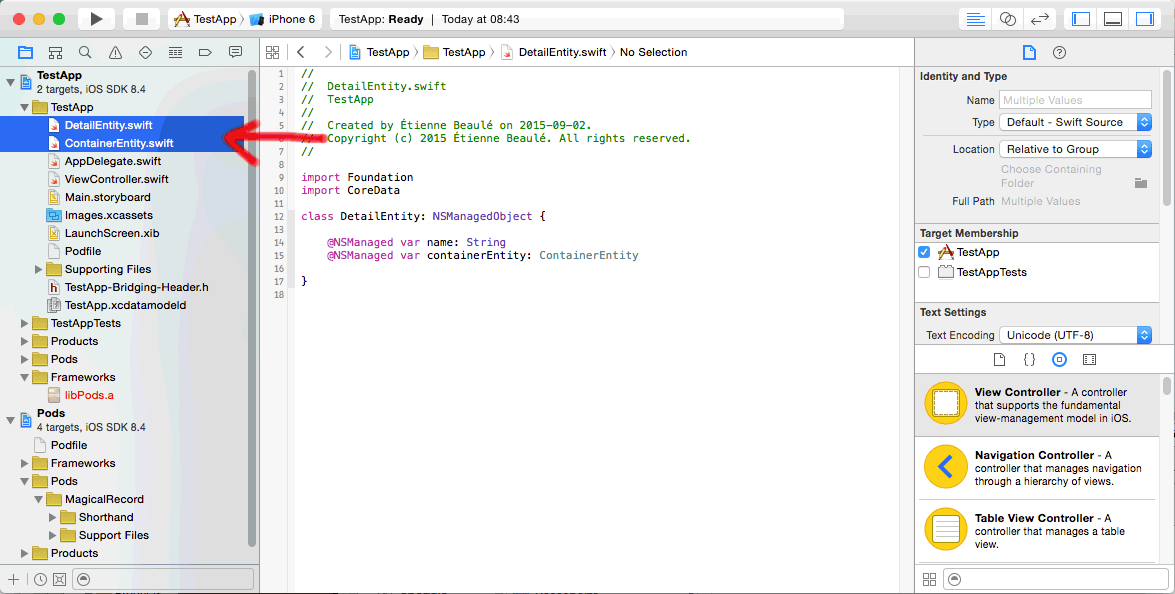
After you hit “Create”, your project should look like this:
We now need to edit the 2 entities to make sure that the Objective-C based MagicalRecord will be able to use them as documented here. To do so:
- Add @objc(ContainerEntity) just above the ContainerEntity class definition (class ContainerEntity: NSManagedObject {)
- Add @objc(DetailEntity) just above the DetailEntity class definition (class DetailEntity: NSManagedObject {)
Your classes should thus look like this:
//
//  ContainerEntity.swift
//  TestApp
//
//  Created by Étienne Beaulé on 2015-09-02.
//  Copyright (c) 2015 Étienne Beaulé. All rights reserved.
//

import Foundation
import CoreData

@objc(ContainerEntity)
class ContainerEntity: NSManagedObject {

    @NSManaged var name: String
    @NSManaged var detailEntities: NSSet

}
…and this:
//
//  DetailEntity.swift
//  TestApp
//
//  Created by Étienne Beaulé on 2015-09-02.
//  Copyright (c) 2015 Étienne Beaulé. All rights reserved.
//

import Foundation
import CoreData

@objc(DetailEntity)
class DetailEntity: NSManagedObject {

    @NSManaged var name: String
    @NSManaged var containerEntity: ContainerEntity

}
We’ll keep following James Leist’ tutorial at this point and create (not reproducing the steps here):
- ContainerEntityVC and the DetailEntityVC
- Storyboard
Once this is all done, everything should work and MagicalRecord should do it’s thing.
[to be continued]
read more